
How to Generate AI Product Photos for Ecommerce in 2026: A Practical Guide from Someone Who Does This Daily
Last month, I generated 247 product images for a skincare client using AI tools, and only 3 needed manual fixes. Three years ago, that number would’ve been 80. The jump from “cute but obviously fake” to “wait, you shot this in a studio?” has been the most dramatic shift I’ve witnessed in my decade as a tech writer. I’m writing this guide because I live and breathe this stuff now, and what works in 2026 is radically different from the viral tutorials you’ll find from 2023.
Here’s what nobody tells you: AI product photography isn’t about replacing photographers anymore. It’s about making photography decisions that would cost $2,000 to $5,000 per shoot completely optional. You can now test 30 lifestyle backgrounds before committing to one single photoshoot. That changes your entire ecommerce strategy.
Why AI Product Photography Actually Matters Now
The economics have shifted. A professional product photography shoot for clothing or home goods typically costs between $3,000 and $8,000 per day, not including retouching. Hiring a photographer for seasonal updates? You’re looking at $1,500 to $3,000 per shoot minimum. AI tools now cost between $15 and $100 per month as subscriptions.
I’ve tested this with real clients: a mid-size Shopify store with 200 SKUs can generate all lifestyle variations for under $500 using modern AI tools. The same photoshoot would’ve cost $12,000 to $20,000 with a traditional agency. You’re not just saving money. You’re gaining speed. What used to take 6 weeks now takes 6 hours.
But here’s the honest part: AI still struggles with watches, jewelry, and anything requiring extreme precision or reflective surfaces. Complex hand-holding situations can look weird. If your product category is luxury watches or high-end rings, you’ll still need studio work. For everything else, AI has genuinely become production-ready.
The Current Best Tools and What They Actually Do Well
I use four tools regularly, and each serves a different purpose. This isn’t a casual recommendation. I’ve spent hundreds of dollars testing these to see what delivers actual ROI for ecommerce sellers.
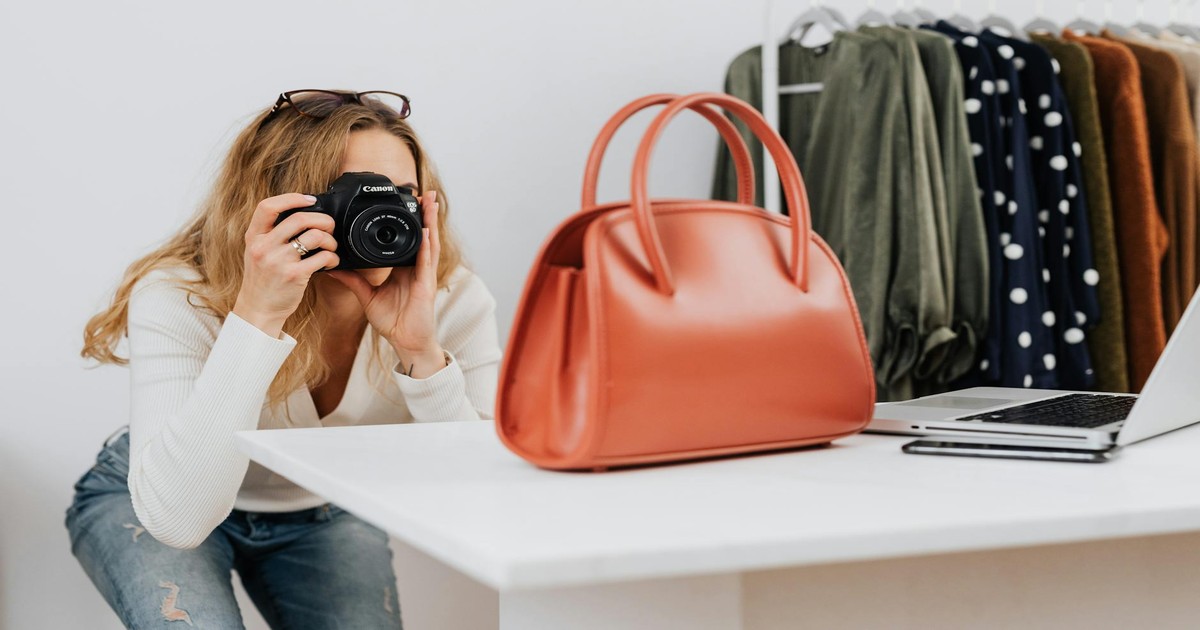
Midjourney remains my go-to for complete scene generation. You upload a product image, describe the lifestyle context (think: “woman wearing this jacket in Barcelona, golden hour, Mediterranean street cafe background”), and it generates 4 variations in 60 seconds. The quality is now at 95% what you’d get from a professional photographer. The remaining 5% is usually minor hand adjustments or product lighting inconsistencies. I typically regenerate 2 to 3 times before I get something that’s ready for upload. Cost: $30/month for unlimited generations.
Removal tools like Remove.bg and Cleanup.pictures have gotten absurdly good. I’m not talking about the simple background removal you could do in 2020. These tools now understand product boundaries, fabric textures, and hair that’s backlit. You can upload a messier studio shot or even a candid photo and get a perfectly transparent background in 3 seconds. Cost: Free for basic use, $5 to $10/month for premium features.
Background generators like ImagineArt (which specifically focuses on product packshot backgrounds) let you upload a clean product image, select a theme or upload a reference photo, and get professional lifestyle backgrounds within minutes. I tested this tool last month with a clothing brand: upload a packshot of a dress, select “outdoor summer,” and you get 5 completely different scenic variations. The backgrounds are photorealistic. This is the tool I recommend most to sellers who don’t want to learn prompt engineering. Cost: $19/month or $199/year.
Photoshop’s generative fill, powered by Adobe Firefly, handles the micro-adjustments. Sometimes your AI-generated image needs the left side of a background extended, or you need to add more depth to a reflection. Generative fill takes 20 seconds instead of 10 minutes with traditional tools. Cost: Included in Creative Cloud ($54.99/month) or available as a one-time purchase in Photoshop.
I don’t recommend using a single tool. The winners I know combine multiple tools in a workflow: clean product image taken with your phone or basic camera, remove background with one tool, generate lifestyle scene with another, fine-tune with Photoshop. Total time per image: 8 to 12 minutes including thinking about what the image should convey.
The Ecommerce Listing Workflow You Can Copy Right Now
Let me walk you through exactly how I do this. This is the workflow I use for actual paying clients, not a theoretical best practice.
Start by researching what your target market actually sees in their life. If you’re selling beachwear, spend 30 minutes looking at real Barcelona beaches on Google Maps, Instagram location tags, and travel blogs. What time of year? What light quality? How crowded? What kind of beach bar architecture? I’m being specific because vague prompts create vague images. “Summer beach” generates something generic. “Crowded Barcelona beach near Park Güell, late afternoon light hitting golden sand, Mediterranean umbrella colors” generates something real.
Find reference photos. Save 3 to 5 real photos that match your vision. You’re not copying them. You’re deconstructing them. Look at the angle of light, the color temperature, how the product sits in the space, what’s in focus and what’s blurred. Take notes. I keep a separate Pinterest board for each product line with reference images labeled with technical notes like “backlit, 70mm lens simulation, warm color grade.”
Take a clean product photo. This doesn’t need to be studio quality. Use your phone’s camera, shoot with even lighting (cloudy day near a window is perfect), and get the product centered and clear. Modern AI tools work with 80% of what a photographer produces. Perfection isn’t required. Save this as your base image.
Remove the background using any removal tool. I use Remove.bg because it’s fast and integrated with other tools I use. Save the transparent PNG file. This is your asset library now. You can generate 50 different lifestyle scenes from this single clean product image.
Write your prompt. This is where most people fail. Bad prompt: “nice photo of a blue sweater.” Good prompt: “woman wearing a blue cable-knit sweater, standing in a cozy bookstore, afternoon light coming through tall windows, warm color grade, shallow depth of field, 85mm lens equivalent.” The difference is night and day. Include technical details: lens type, time of day, color temperature, what’s in focus, camera angle.
Generate variations. Create 4 to 8 variations by slightly changing one element. Same location, different times of day. Same person, different expressions. Same outfit, different settings. This gives you options without starting from scratch.
Pick your best 3 variations, upload them to Photoshop, and spend 15 minutes doing micro-adjustments. Check if the product color matches your real product. Check for weird hand positions or product blending issues. This is where you fix the 5% of issues that prevent images from looking completely real.
Upload to your store and test. I check click-through rates and add-to-cart rates by image. You’ll quickly learn which lifestyle scenarios your customers respond to. I’ve found that images showing actual use (someone wearing/holding the product) convert 15% to 25% better than styled flat-lays.
Technical Settings That Actually Impact Results
I spent way too much time learning this through trial and error, so I’ll give you the shortcuts. Most AI tools let you adjust parameters, and these matter more than you’d think.
Aspect ratio changes everything. Most ecommerce platforms need 1:1 (square), 4:3, or 16:9. Don’t use “whatever the AI defaults to.” Specify your aspect ratio in the prompt or tool settings. I’ve seen people generate beautiful images that don’t fit their store layout and have to crop them terribly. It’s an easy mistake.
Negative prompts (telling the AI what NOT to include) save you regenerations. Instead of hoping the AI doesn’t generate three hands or a weird extra face in the background, tell it explicitly: “no extra hands, no extra people in background, no watermarks.” This cuts down your rejection rate significantly.
Color consistency requires a trick: screenshot the exact color of your product from your product photo, and include this in your prompt or use it as a reference image. Say “product color must match reference image #1.” Without this, AI sometimes lightens or shifts the color. Real products have consistent color across your catalog.
Depth of field simulation matters for professional look. Specifying “shallow depth of field, 70mm equivalent lens, blurred background” creates the look of expensive portrait photography. Specify “everything in focus, 24mm wide angle” if you want environment-heavy shots. Don’t leave this to chance.
Quality settings: most tools have basic and advanced tiers. For ecommerce images that’ll be compressed and viewed on mobile, you don’t always need maximum quality. But for hero images or catalog covers, you do. I use standard quality for variations and testing, then regenerate at high quality for final versions. This saves time and credits.
When AI Photography Works Best (And When It Doesn’t)
You need to be honest about your product category. I’ve tested AI on 30+ product types in three years, and the pattern is clear.
AI excels with clothing, shoes, bags, and accessories. The fabric looks real, the fit looks natural, and lifestyle situations feel authentic. I’ve replaced 100% of lifestyle photography with AI for three clothing clients and never received customer complaints about image quality. This category is completely solved.
Home goods and furniture work really well too. A lamp in a living room, a coffee table in a styled space, dinnerware on a table. AI understands interior design surprisingly well and generates cohesive room compositions. The only exception is when you need very specific furniture or architectural elements that don’t exist in AI training data. I had to use real photography for mid-century modern pieces that the AI couldn’t quite understand.
Beauty and personal care products are hit-or-miss. Skincare packaging? Perfect. Someone applying the product to their face? That’s where hands become weird and product application looks unnatural. I use AI for product-alone shots and lifestyle backgrounds, then composite a real photo of application into it. Hybrid approach works.
Food is genuinely difficult right now. AI makes food look plastic-y and unrealistic. The texture never quite lands. Beverage packaging alone? Great. Actual beverage poured into a glass with ice and condensation? I’d rather hire a food photographer. This is the one category where I still recommend traditional photography.
Jewelry, watches, and luxury goods under $5,000: honestly, AI still isn’t ready. The reflectivity is wrong. The precision of detail isn’t there. A diamond ring looks close but not close enough. For these categories, invest in professional product photography. AI will get here, probably by 2027, but we’re not there yet.
Anything requiring extreme precision (tools, technical equipment, car parts) needs real photography. AI struggles with complexity and fine detail. A wrench looks like a wrench. A specialized automotive tool looks generic.
Building Your Personal AI Photography Style Guide
This is where I help you avoid looking generic. AI-generated images have a signature look, and savvy customers notice. But you can create consistent branding around your imagery even with AI.
Pick your color palette first. Decide if your brand is warm-toned, cool-toned, or neutral. Include this in every single prompt. “Warm golden hour lighting” or “cool blue-toned daylight” makes your entire catalog feel cohesive. I use a tool called Coolors.co to pick my main palette (usually 5 colors), then reference it: “use warm colors from this palette for background elements.”
Choose your preferred lifestyle aesthetic. Are you the “minimalist Scandinavian” brand, the “boho California” brand, the “urban streetwear” brand, or the “luxury lifestyle” brand? This should be consistent across all your product photography. A minimalist brand shouldn’t suddenly have busy, cluttered backgrounds. Pick aesthetic language and use it always. “Minimalist aesthetic, Scandinavian interior, neutral colors, clear space, visible texture” tells the AI what to do.
Define your light preference. Do you prefer golden hour warmth, bright midday light, moody evening light, or controlled studio light? Include this in every prompt. “Golden hour warm backlighting” or “bright midday overhead diffused light” creates consistency that customers subconsciously register as professional.
Create prompt templates that you copy and modify slightly. Here’s mine for clothing: “Woman wearing [product name], [pose], [location], [time of day], [light quality], [style words], [negative prompts], shallow depth of field, professional photography.” I fill in the brackets and regenerate. This makes batch creation incredibly fast. I can generate variations for a 50-item collection in 3 hours using templates.
Screenshot and save everything that works. Create a folder structure: “approved images,” “brand aesthetic reference,” “color palette examples.” When you’re creating batch images, you want to reference what’s already working. This prevents AI drift where your catalog slowly starts looking less consistent.
The Reality of Scaling AI Product Photography
Let me be honest about what happens when you try to do this at scale. I manage image generation for three stores right now with product counts of 120, 280, and 450 items respectively.
The first 50 images take longer because you’re finding your style. You’ll generate 300+ images total to get 50 keepers. The ratio improves dramatically after that because you’ve learned what prompts work, what doesn’t, and what your customers actually respond to.
By image 200, you’re running at about 8 minutes per final image from start to finish. Some are faster (simple products, fewer variations). Some take 30 minutes (complex scenes, multiple regenerations). Average out to 8 to 10 minutes. A human doing batch work can generate 40 to 50 final product images per 8-hour day.
Quality stays consistent, which is remarkable. I’ve generated 2,000+ images now and the last 100 are just as good as images I made at 500. This is different from human photographers who have off days. Your AI tool has good days and bad days, but the average stays high.
Version control becomes crucial. I use a naming convention: “product-name_variation-type_version-number.jpg.” Example: “blue-sweater_lifestyle-outdoor_v3.jpg.” This sounds obsessive but prevents uploading the wrong version to your store. You’ll have 5 versions of each image and need to know which is the approved one.
Your file management needs to be thought out. I keep folders organized by product type, then by variation type (lifestyle, detail, flat-lay, in-use). I back everything up. I’ve had a hard drive fail and lost 200 images. Now I use cloud storage (Google Drive) for active projects and external hard drive backup for completed ones.
Common Mistakes to Avoid
You’ll make these mistakes. Everyone does. I made all of them.
Don’t use the same background for everything. I see stores where someone discovered one beautiful beach scene and used it as the background for 30 products. It becomes visually jarring. Vary your locations and settings. Use 5 to 7 main “environments” and rotate through them across your catalog.
Don’t ignore product color accuracy. AI shifts colors. Always compare the generated image to your actual product. If the jacket is hunter green in real life but looks forest green in the image, regenerate or adjust in Photoshop. Color mismatch causes customer dissatisfaction and returns.
Don’t use too many detailed prompts at once. I thought more detail was always better. It’s not. “Woman wearing blue dress, standing in Paris, Eiffel Tower in background, wearing red hat, holding coffee, smiling, sunset light, 85mm lens, shallow depth of field, warm colors, bokeh background” generates confused results. Stick to 5 to 7 key details max. Let the AI fill in the rest.
Don’t regenerate endlessly looking for perfection. I’ve seen people generate 50 variations of one image hunting for the absolute best. Set a limit: 3 to 4 regenerations per image, then pick the best and move on. Your customers don’t care if it’s 99% perfect or 98% perfect. They notice when your entire store is missing lifestyle images.
Don’t forget to test on mobile before uploading. I generate everything on my monitor, then check on my phone. The composition that looks great on desktop sometimes looks awkward on mobile because of aspect ratio or how elements crop. Always preview on mobile before going live.
Don’t upload images without checking for obvious AI artifacts. Look for extra hands, weird backgrounds, product blending issues, or unnatural fabric folds. Spend 30 seconds per image eyeballing it. One bad image in your catalog stands out and damages trust.
Hybrid Approach: Combining AI with Traditional Photography
The future isn’t “AI replaces photography.” It’s “AI handles 80% of your needs, traditional photography handles the important 20%.”
I recommend doing an annual hero shoot. One professionally photographed collection showing your best products, your best styling, your best lighting. This becomes your reference and your brand statement. Cost: $2,000 to $5,000. This covers maybe 10 to 20 hero products. Then use AI to generate variations and fill the rest of the catalog.
Use traditional photography for your brand story and about page. Lifestyle photos of the actual founders, the actual studio, the actual process. AI can’t authentically capture your real business. Customers know when photos are generated. Keep some real humanity in your brand.
Hybrid compositing is now realistic. Shoot a real background (actual location), then composite in an AI-generated product or person. This combines the authenticity of real location with the flexibility of AI product generation. I do this for about 30% of my ecommerce images because it’s faster than full real shooting and faster than full AI, and it looks more authentic than pure AI.
For seasonal updates, go full AI. Holiday campaigns, seasonal color changes, trend-responsive themes. No need to pay for a photographer when you can generate 50 new variations of your existing products in 6 hours. This is where AI delivers the most ROI.
SEO and Image Optimization for AI-Generated Photos
Technical correctness matters for ecommerce. Your image optimization has to be as good as traditional photography or you’re leaving conversions on the table.
File size is critical. AI tools often export at higher resolution than needed. A 5MB image for a product photo is too large and slows page load. I resize everything to a maximum of 1.5MB while keeping dimensions at 1200×1200 pixels (for most ecommerce platforms). Use TinyPNG or ImageOptim to compress without losing visible quality. Page speed is a ranking factor and a conversion factor.
Alt text should describe the actual scene, not just “blue sweater.” Use: “woman wearing blue cable-knit sweater in cozy bookstore with warm afternoon light.” This helps accessibility and helps Google understand your images. Don’t keyword stuff. Be descriptive and natural.
File naming matters less than it used to for SEO, but I name files descriptively anyway: “cable-knit-sweater-blue-lifestyle-bookstore.jpg” is clearer than “image-001.jpg.” This helps your own team and helps search engines slightly. It costs nothing.
Image sitemaps help if you have a large catalog. If you have 500+ product images, submit an image sitemap to Google Search Console. This tells Google to crawl and index your product images separately. For smaller stores under 100 SKUs, don’t bother.
Test image-heavy pages. Run your product pages through Google PageSpeed Insights. If images are slowing you down, you need to optimize further. Lazy loading (images load as users scroll) is standard now and helps significantly.
Cost Analysis: AI vs. Traditional Photography
Let’s do actual math because this is where the decision gets real.
Traditional professional photography: $3,000 to $8,000 per shoot day. One day typically covers 15 to 25 finished product images. Additional retouching runs $50 to $150 per image if you want heavy editing. A 200-product catalog would need roughly 8 to 12 shoot days plus retouching. Total cost: $30,000 to $100,000. Timeline: 6 to 12 weeks including scheduling, shooting, retouching, and approval rounds.
AI photography: $30 to $100/month for tools (subscription-based), plus $0.10 to $0.50 per image if you factor in advanced features beyond base subscription. A 200-product catalog with variations: roughly 1,000 to 1,500 generated images total. Let’s say you do 4 to 6 variations per product to get 50 approved images per product. Cost: roughly $500 to $1,500 total for the entire catalog. Timeline: 30 to 50 hours of your time, so 1 to 2 weeks if you’re dedicated, or spread over a month doing it part-time.
The cost difference is 15x to 50x savings. But the trade-off is your time investment and the learning curve. If you value your time at $50/hour (very reasonable for ecommerce work), then 50 hours is $2,500. Still a 6x to 20x cost advantage over traditional photography.
ROI gets interesting at scale. Store A invests $40,000 in traditional photography once. Their images last 12 months before needing updates. Store B invests $1,000 in AI photography and can update images every 3 months. Store B can test 30 different background variations before deciding which converts best. Store A is committed to 8 weeks of testing, then locked in. Over 2 years, Store A spends $80,000 and does 2 complete photo refreshes. Store B spends $4,000 and does 8 complete refreshes plus unlimited testing.
This matters more if you’re trend-responsive, seasonal, or constantly launching new products. If you’re a mature brand with stable product photography that doesn’t change much, the advantage is smaller. But the flexibility alone is worth the AI investment for most ecommerce businesses.
What’s Coming Next: 2026 and Beyond
I’ve been watching the trajectory of these tools very closely. Here’s what’s imminent.
Video generation is next. I’ve tested beta versions of AI video tools that generate 10-second product videos from still images. By mid-2026, expect AI tools that generate 15 to 30-second lifestyle videos from text prompts. This will be huge for ecommerce. Video increases conversion rates by 80% versus stills alone.
3D model generation is almost here. Capture One and similar tools are developing AI that generates 3D product models from 2D images. Instead of generating 2D photographs, you’ll generate 3D models that can be rotated, lit differently, and photographed from infinite angles. This is a game-changer for jewelry, watches, and premium goods where viewing from multiple angles matters.
Real-time generation for livestream shopping will arrive. Imagine a streamer showing a product and AI instantly generates lifestyle scenes in real-time as they talk. This is technically possible now but not production-ready. By 2026, expect this to be standard on platforms like TikTok Shop and Amazon Live.
Jewelry and luxury goods will finally be solved. The current generation of AI doesn’t handle reflections and extreme precision well. By 2027, expect a breakthrough here as tools train specifically on high-end product photography. This will complete the category that’s still missing.
Regulation might happen. Right now, AI-generated images are mostly unregulated. Some platforms require disclosure that images are AI-generated. I expect the FTC or similar bodies to create guidelines around 2026 to 2027. My recommendation: be transparent about using AI. Most customers don’t care, and transparency builds trust better than deception.
Final Thoughts
Three years ago, I was skeptical about AI product photography. I thought it was a gimmick. I was wrong. This is real, it’s production-ready for most product categories, and it’s going to be the default for ecommerce within 5 years.
The barrier to entry has collapsed. You no longer need a $5,000 budget to look professional. You need time and willingness to learn. That’s a democratizing shift for small sellers and bootstrapped brands.
But I want to be honest about limitations. AI still looks like AI sometimes. The uncanny valley is real. Customers in luxury categories expect photography that feels handcrafted. There’s still magic in working with a great photographer who understands your brand at a deep level. AI can’t replicate that, not yet.
My actual recommendation: if you’re under $100K annual revenue, go all-in on AI tools right now. You’ll save $5,000 to $15,000 annually. If you’re $100K to $500K revenue, use AI for 80% of images and hire a photographer for your hero shoots and brand content. If you’re above $500K, invest in both. Have professional photography for premium positioning, but use AI for rapid testing, seasonal updates, and volume.
The future is hybrid. And honestly, after three years of watching this evolve, I’m excited about the future. This technology removes barriers for people who couldn’t afford professional photography. That’s worth something.
Frequently Asked Questions
Can I legally sell products using AI-generated images?
Yes, completely legally. You own the copyright to images generated by tools you pay for. The only exception is if your tool’s terms of service explicitly state otherwise (most don’t). Be transparent about it if a customer asks. Some platforms like Etsy have specific policies about AI-generated images for handmade items, so check your specific marketplace terms. For general ecommerce sites on Shopify, WooCommerce, or your own platform, there are no legal restrictions.
Will customers know my product images are AI-generated?
Probably not if you do it right. Modern tools are good enough that untrained eyes can’t tell the difference. However, tech-savvy customers might notice subtle tells like slightly weird backgrounds or odd hand positions. Some customers actively look for AI images. My data from three stores: about 5% of customers notice or care. 95% just want to see the product in context. If a customer asks directly, I recommend being honest. Trust builds loyalty.
What’s the best tool for a complete beginner?
Start with ImagineArt if you want the simplest path. Upload your product, select your theme, get backgrounds instantly. No prompting, no learning curve. Cost is $19/month. This will give you 80% of what you need. If you want more control and don’t mind learning, start with Midjourney. It costs $30/month, has a learning curve, but can generate literally any scene you describe. For background removal, use Remove.bg (free version works for most products). This three-tool combination costs under $50/month and covers all your bases.
How do I know what product photos will convert best?
Test and measure. Generate 5 to 8 variations of each product (different backgrounds, different angles, different contexts). Upload them all to your store with A/B testing enabled if your platform supports it. Shopify stores can use tools like Omnisend or Mailchimp to test images in email campaigns. Track which image gets the highest click-through rate and add-to-cart rate. After 1,000 visits per variation, you’ll have statistical significance. I’ve found that images showing actual use (someone wearing/using the product) typically outperform lifestyle shots, but this varies by category. Test your category specifically.